


 Your Guide to Amazon Influencer Programs
Creating product videos isn't just about hitting record; it's a strategic process that moves from planning and scripting all the way through to the final edit. The best approach I've found? Focus on your product's core benefits and tell a story that genuinely connects with your audience, instead of just rattling off a list of features.
Table of Contents
Why Product Videos Are Your Best Sales Tool
In today's crowded online marketplace, product videos have stopped being a "nice-to-have." They are your most persuasive digital salesperson, working around the clock. Static images and text descriptions can only do so much. Video, on the other hand, breathes life into your product, showing its value in a dynamic, real-world context that builds instant trust and understanding.
Think of it this way: a product video closes the gap between the digital shelf and the customer's hands. It anticipates and answers questions, tackles common objections head-on, and gives shoppers the confidence they need to finally click "add to cart." This is about more than just showing off your product; it's about forging a human connection and making the path to purchase as short as possible.
The Psychology of Persuasion
So, why is video so ridiculously effective? It all comes down to human psychology. Our brains are hardwired to process visual information far more quickly and effectively than text. When a potential customer watches a video, they aren't just reading specs; they're seeing the product in action, which helps them immediately visualize how it will fit into their own life.
This visual storytelling creates an emotional connection that static content just can't replicate. It’s the difference between reading about a durable backpack and actually seeing it withstand a downpour on a hiking trail. That demonstration of value is infinitely more compelling and memorable.
A well-crafted video does more than just inform; it inspires confidence. It shows potential customers that you believe in your product enough to demonstrate its quality and functionality, building a foundation of trust that is essential for any e-commerce transaction.
Driving Real Business Outcomes
When you start treating video creation as a core business strategy—not just another marketing task—you unlock its true potential. The numbers don't lie. Today, 89% of companies are using video as a marketing tool, and a staggering 93% of marketers report a positive return on their video efforts. This isn't just a trend; it's fueled by tangible results, with video directly boosting sales for 84% of businesses. If you want to see the full picture, I recommend diving into more video marketing statistics to grasp its influence.
The benefits ripple across the entire customer journey:
- Increased Brand Awareness: Videos are incredibly shareable, helping your brand reach entirely new audiences.
- Higher Engagement: They capture and hold attention far better than almost any other medium out there.
- Improved Conversion Rates: A great video on a product page can significantly lift sales by making the value crystal clear.
- Reduced Return Rates: When customers see exactly what they’re getting, they're much less likely to be disappointed.
Ultimately, learning how to create compelling product videos is an investment in clarity, trust, and most importantly, growth.
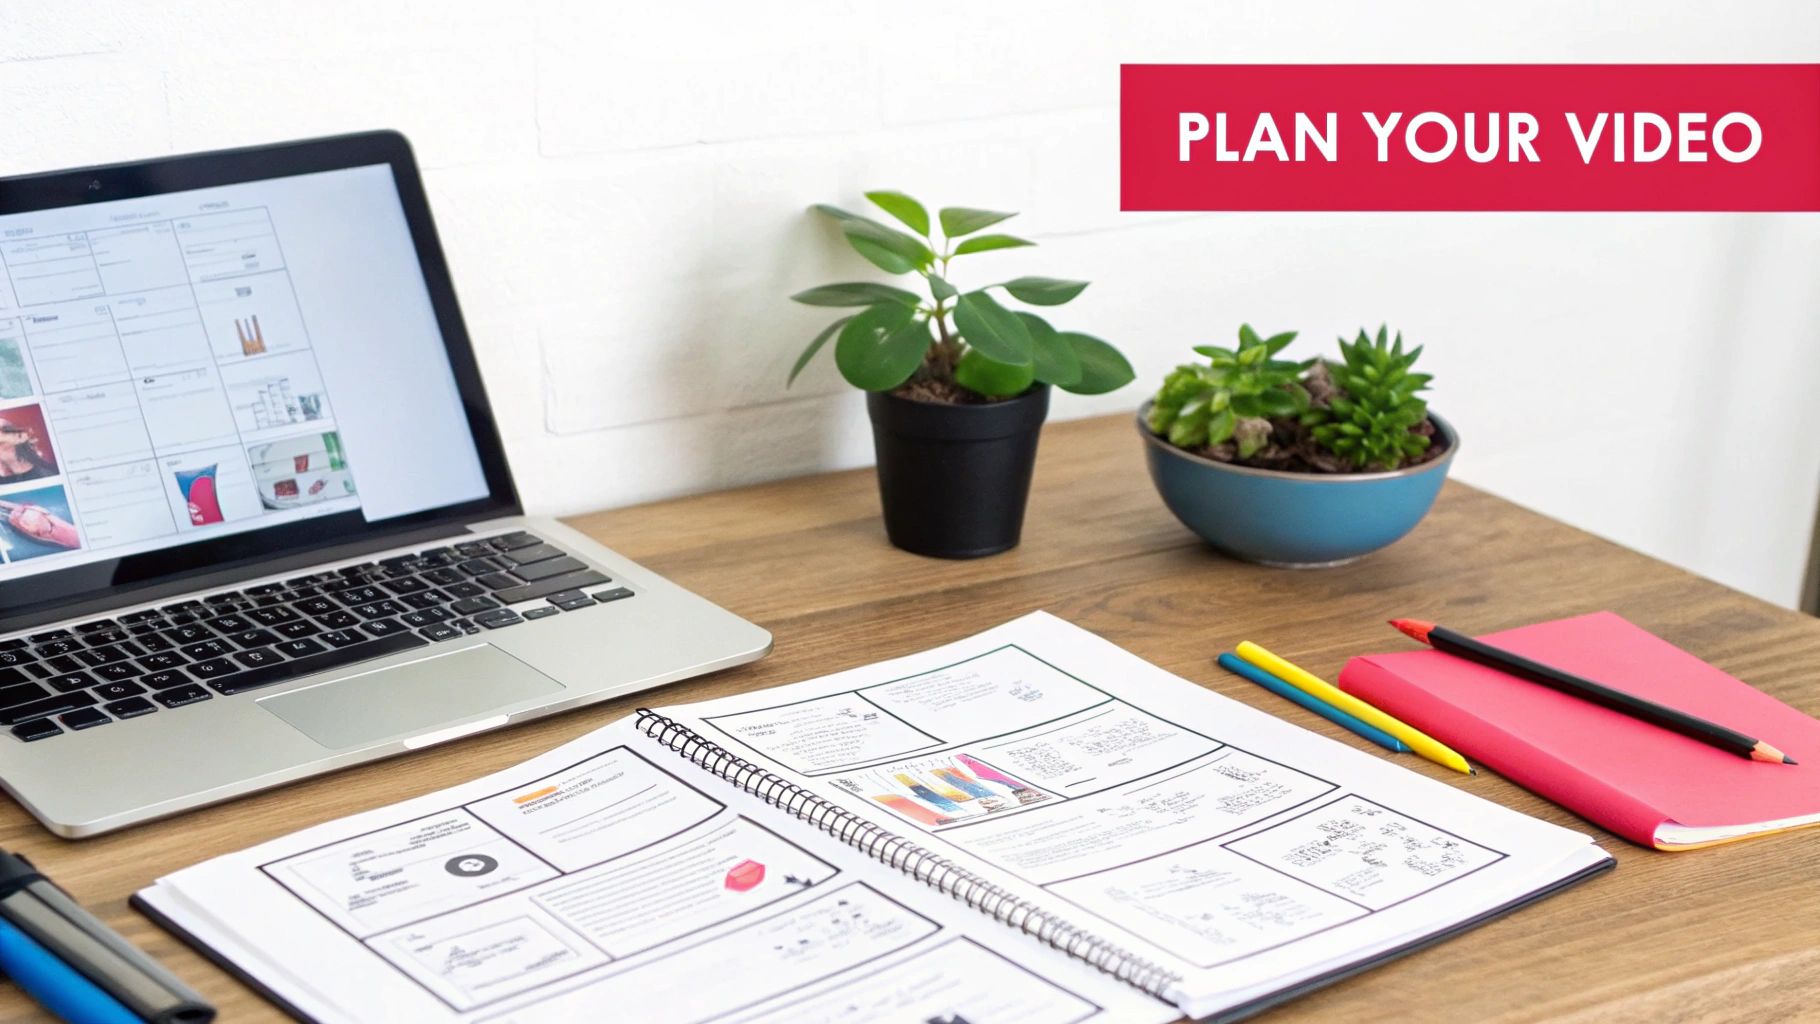
Your Pre-Production Blueprint for Success
Great videos aren’t made on filming day. They're made long before you even think about hitting the record button. This is the planning phase—the pre-production—and trust me, getting this part right will save you an unbelievable amount of time, money, and headaches down the line.
Think of it like building a house. You wouldn’t just start nailing boards together without a detailed blueprint, right? The same goes for video. This is where you map out what you’re building, who you’re building it for, and what you want them to do when it’s all finished. Skip this, and you’re setting yourself up for a chaotic shoot and a final video that completely misses the mark.
Define Your Video’s One True Goal
Before you get lost in the world of cameras and lighting, you need to answer one simple, yet critical, question: What is the single most important thing this video needs to accomplish?
A video that tries to be everything to everyone ends up being nothing. Your goal is your north star; it dictates the entire creative direction, from the tone and style all the way to the final call to action.
Most product videos have one of these goals:
- Driving immediate sales: These videos are sharp and focused. They hammer home the product's key benefits and finish with a strong, direct CTA like "Shop Now." The classic structure is problem-solution, with your product as the hero.
- Explaining a complex feature: Got a cool tech gadget or a product with a bit of a learning curve? An explainer or how-to video is your best friend. The goal here isn't a hard sell; it's about clarity and education, making your customers feel confident and smart.
- Building brand affinity: Sometimes, it’s not about the immediate sale. It's about creating an emotional connection. These are often lifestyle videos that place your product in an aspirational setting, helping viewers imagine it as part of a life they want.
You absolutely must have clarity at this stage. Pick your primary objective and write it down. Every decision you make from here on out should be measured against that one single goal.
Know Your Audience and Craft Your Core Message
Alright, you’ve got your goal. Now, who are you talking to? Seriously, picture them. What are their biggest frustrations? What kind of language do they use? A video for a tech-savvy early adopter is going to feel completely different from one aimed at a busy parent looking for a simple solution.
Your core message is the sweet spot where your product's #1 benefit meets your audience's biggest need. Don't just rattle off a list of features nobody cares about. Instead, zero in on the single most compelling benefit that will make your target viewer stop and listen. Keep it simple, clear, and memorable.
Let's say you're selling a portable blender.
- Bad Message: "Our blender has a 20,000 RPM motor, a USB-C charging port, and a patented six-point blade system." (Features)
- Good Message: "Make healthy, delicious smoothies anywhere in under 30 seconds." (Benefit)
See the difference? The second one is all about the user. It’s persuasive because it solves a problem. This core idea will guide everything from your script to your visuals.
Despite how powerful video is, just getting started is a huge roadblock for many. A 2025 report revealed that 37% of marketers who aren't using video simply don't know where to begin. Time is another big one for over 25% of them. It's no surprise, then, that 73% of video marketers lean on explainer videos to clearly communicate product value. You can dive into more insights by reading the full report on video marketing statistics.
From Script to Storyboard
With your goal, audience, and message locked in, it’s time to get your vision down on paper. This isn't just busy work; this two-part process is what makes your shoot day smooth and your final story powerful.
1. Writing the Script
Your script is so much more than just dialogue. It's the blueprint for the entire audio experience. It should include every single word that will be spoken, any text that will appear on screen, and even brief notes on the visuals that will accompany the audio. A huge tip: read it out loud. You'll immediately catch any stiff or awkward phrasing. A solid script ensures your message comes across exactly as you intended.
2. Creating the Storyboard
Next, you visualize it. A storyboard is basically a comic-strip version of your video, mapping it out shot by shot. It doesn't have to be a masterpiece—stick figures and sloppy sketches work just fine. The whole point is to plan your camera angles, map the flow of the story, and know exactly what shots you need to get. This simple tool is one of the best ways to avoid wasting precious time on set and ensures you walk away with every visual puzzle piece you need for the edit.
Assembling Your Video Kit on Any Budget
One of the biggest myths that holds brands back from creating product videos is this idea you need a Hollywood-sized budget to even get started. The truth? That powerful camera sitting in your pocket is often more than enough.
It's not about having the flashiest, most expensive gear. It’s about using the right tools—and the right techniques—to make your product truly shine. Let's break down how you can put together a killer video kit that delivers professional results, whether you're starting from zero or ready to invest a little more.
Start With What You Already Have: Your Smartphone
Modern smartphones are absolute filmmaking powerhouses. With incredible camera sensors and processing power, your iPhone or Android is the perfect entry point into product videography. The real secret is moving beyond the default "point and shoot" mode and taking a bit more manual control.
Before you spend a single dollar, get comfortable with these settings:
- Lock Focus and Exposure: Tap and hold on your product on the screen. This locks the focus and brightness, stopping the camera from distractingly "hunting" for focus or flickering the lights mid-shot.
- Shoot in 4K: If your phone supports it, always record in 4K. This gives you way more flexibility later on, allowing you to crop in on a shot without a noticeable drop in quality. You can always export the final video in 1080p.
- Use the Back Camera: This might seem obvious, but the rear-facing cameras are almost always miles better than the front-facing selfie camera. They have superior sensors that produce a much higher-quality image.
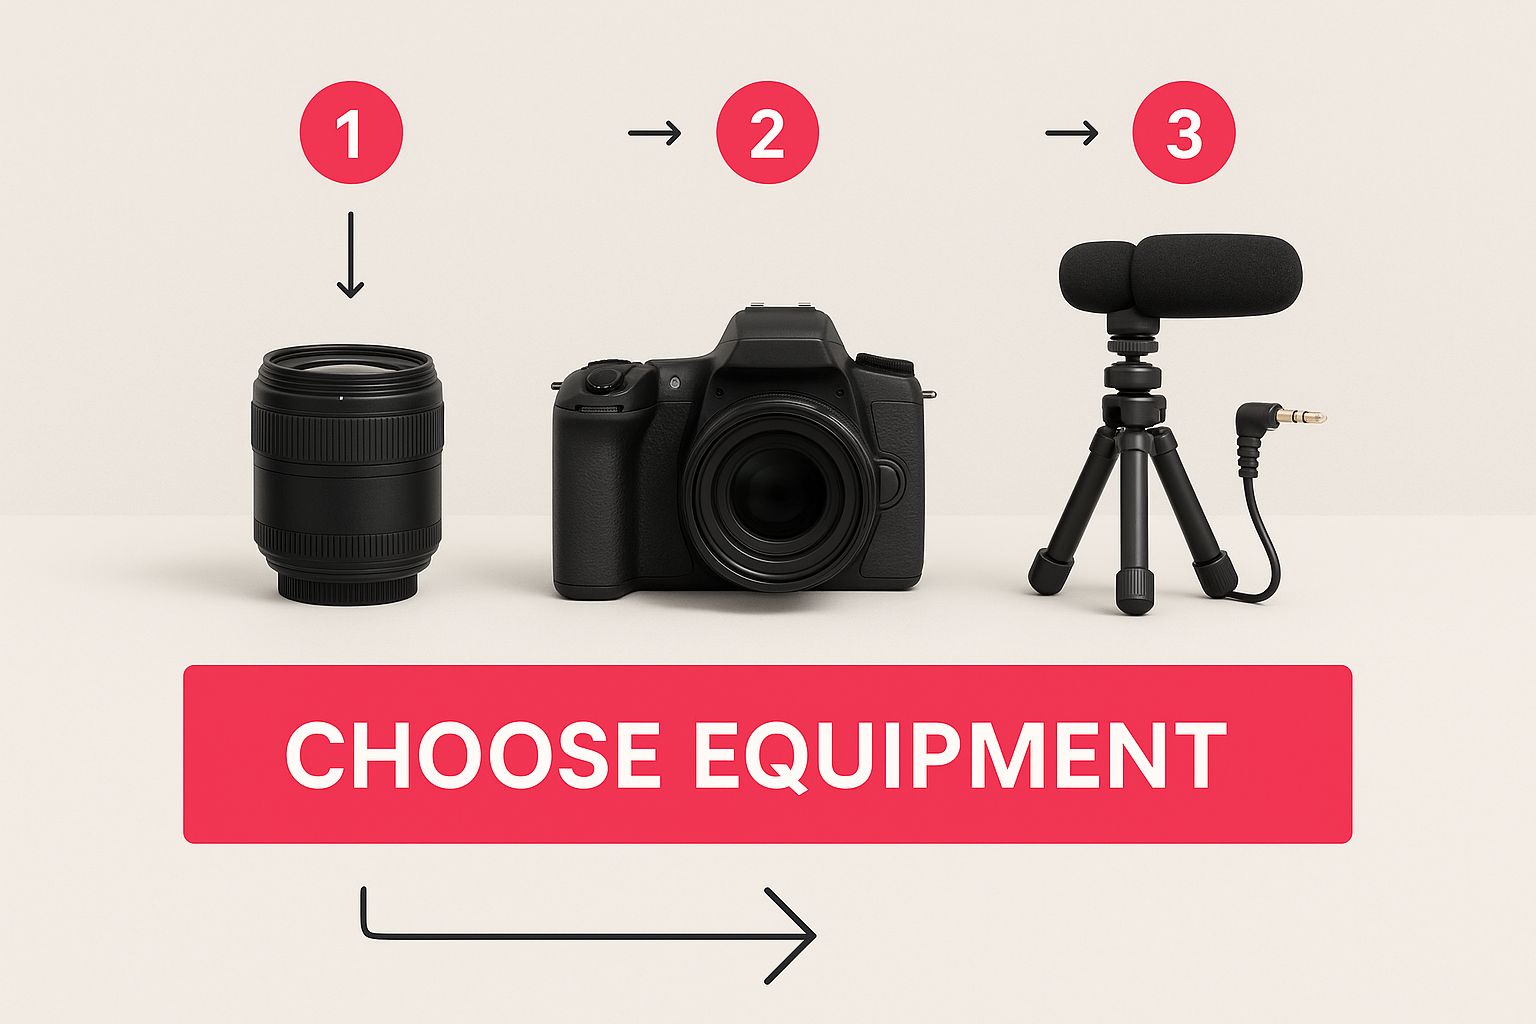
Simply laying out your gear like this before a shoot is a great first step. When you thoughtfully choose your equipment, you're setting the foundation for a much smoother production process.
The Three Pillars of a Quality Video Kit
Once you've mastered your camera, there are three other essential components that will instantly lift your product videos from amateur to professional: stabilization, lighting, and audio. If you drop the ball on any of these, it immediately signals low production value to a viewer.
You could have the most expensive 8K cinema camera in the world, but if your audio is muffled and your lighting is dim, viewers will click away in seconds. On the flip side, a well-lit, stable shot with clear audio filmed on a smartphone will always look professional.
Let’s look at some smart, budget-friendly options for each.
A well-rounded video kit doesn't have to break the bank. You can build an effective setup by choosing gear that matches your current needs and budget, upgrading components as you grow. The table below breaks down some of our favorite recommendations for getting started at different price points.
Essential Product Video Gear for Every Budget
| Equipment Type | Budget-Friendly Option (Under $200) | Mid-Range Setup ($200-$800) | Prosumer Kit ($800+) |
|---|---|---|---|
| Camera | Your existing smartphone | Entry-level mirrorless (e.g., Canon M50, Sony ZV-E10) | Mid-range mirrorless (e.g., Sony a6700, Fujifilm X-S20) |
| Stabilization | Basic smartphone tripod | Sturdier tripod with a fluid head (e.g., Manfrotto Compact Action) | Motorized gimbal (e.g., DJI Ronin series) |
| Lighting | Natural window light + reflectors | Single LED softbox or a large ring light | Two- or three-point LED light kit (e.g., Godox SL60W, Aputure Amaran) |
| Audio | Wired lavalier microphone | Wireless lavalier system (e.g., Rode Wireless GO II) | High-quality shotgun microphone (e.g., Rode VideoMic NTG) |
No matter which path you choose, focusing on mastering the fundamentals with the gear you have will always yield better results than simply buying more expensive equipment.
Get Rid of the Shakes with Stabilization
Nothing screams "amateur" like shaky, jarring footage. The easiest fix is a tripod. You can find a decent smartphone tripod for under $30, and it's an absolute non-negotiable for static shots like product close-ups or tabletop demos.
For those more dynamic, moving shots that follow the action, a gimbal is your best friend. It uses motors to create that buttery-smooth motion you see in high-end commercials.
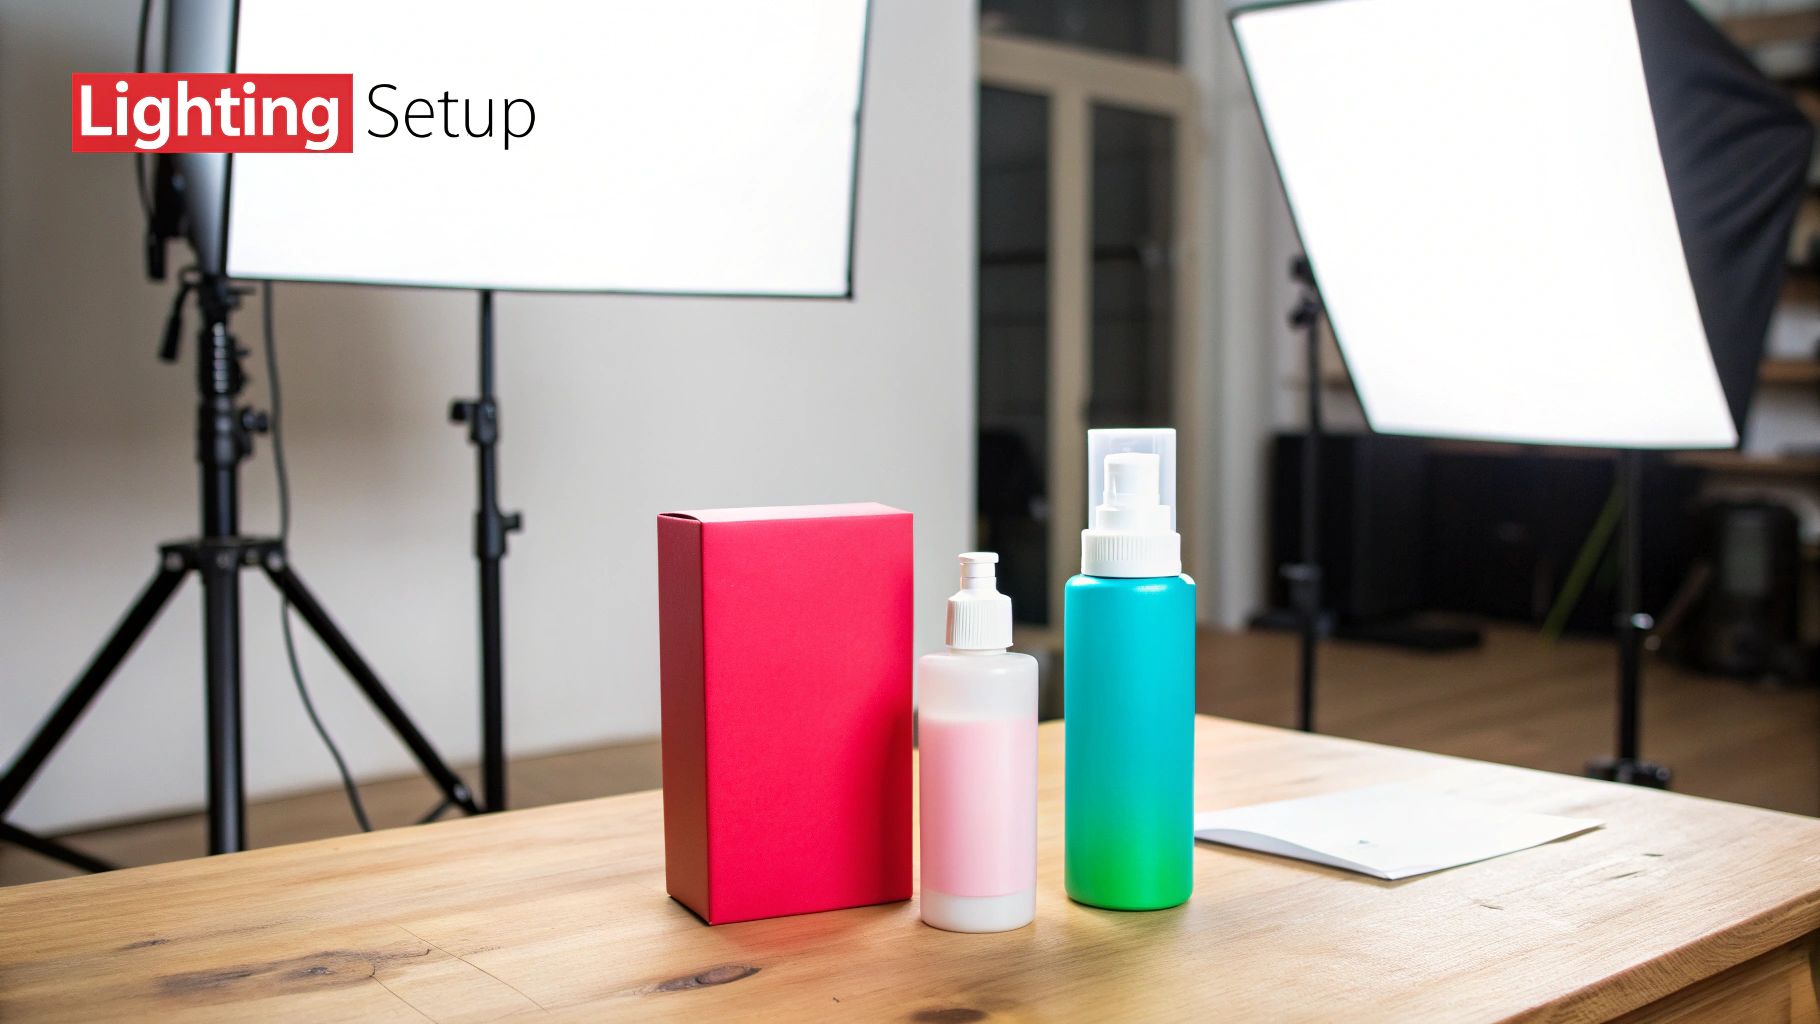
Make Your Product Look Its Best with Lighting
Bad lighting is the fastest way to make an incredible product look cheap and unappealing. The good news is you don't need a complex studio rig to get started. The best light source is completely free: natural window light. Just position your product near a large window on an overcast day for beautiful, soft, flattering light.
When you're ready to upgrade, here are two great options:
- Ring Lights: These are perfect for smaller products and any on-camera talking segments. They create a clean, even light and a distinctive circular catchlight in the eyes or on reflective surfaces.
- Softboxes: For larger products, softboxes are far more versatile. They produce a soft, diffused light that wraps around your product, minimizing harsh shadows and giving your video a polished, cinematic feel. Even a single softbox can make a massive difference.
Remember That Sound is Half the Experience
Your phone’s built-in microphone is designed to pick up sound from all directions. That means it also picks up every distracting echo, air conditioner hum, and background noise. Trust me, this is a huge mistake to overlook.
An external microphone is arguably the single most important investment you can make. For most product videos, a lavalier microphone (often called a "lapel mic") is a fantastic choice. You can clip it to your shirt to capture crystal-clear dialogue for a tutorial, or even place it just out of the frame to record specific product sounds. Wired versions are incredibly affordable and offer a massive leap in audio quality.
Shooting Footage That Captures Attention
With a solid plan and your gear ready, it’s time for the fun part: bringing your vision to life. All that pre-production work is about to pay off, letting you focus on capturing beautiful, persuasive footage. The goal here isn't just to point and shoot; it's to create visuals that stop a scroller mid-swipe and make your product look absolutely irresistible.
The secret to amazing product videos isn't some complex industry secret. It really just boils down to a few core principles of visual storytelling and paying attention to the details that amateurs often miss. Nail these techniques, and you'll elevate your content from a simple recording to a professional-grade marketing asset.
Mastering Your Shot Composition
How you frame your product has a massive impact on how people see it. A well-composed shot feels balanced and professional. A poorly framed one can look chaotic and cheap. The good news is you don't need to be a seasoned cinematographer to get this right.
A great starting point is the rule of thirds. Just imagine your screen is split into a 3×3 grid. Instead of sticking your product dead center, try placing it along one of the lines or at an intersection point. This one simple trick creates a more dynamic and visually interesting image that naturally guides the viewer's eye.
On top of that, variety is your best friend for keeping viewers hooked. Don't just rely on a single, static shot for the whole video. A dynamic mix of angles and perspectives tells a much richer story.
- Wide Shots: These set the scene and show the product in its natural habitat. Think of a durable backpack out on a hiking trail or a sleek coffee maker on a pristine kitchen counter.
- Medium Shots: Now we're getting a bit closer to show the product in use. This is perfect for demonstrating a key feature or showing how a person actually interacts with the item.
- Close-Up Shots (B-Roll): These are your money shots. Get right up close to those little details—the texture of a fabric, the soft glow of an indicator light, or the satisfying click of a button. These shots add a premium, tactile feel to your video that you just can't describe with words.
The Power of Great Lighting
Let's be clear: lighting is everything in video. It sets the mood, shapes the product, and is often the single biggest difference between amateur and pro-level footage. Luckily, you don't need a massive studio budget to get incredible results.
Your most powerful lighting tool is often free—natural window light. If you can, place your product near a large window on a slightly overcast day. This gives you soft, diffused light that smooths out harsh shadows and makes everything look clean and appealing.
When you need more control, a basic three-point lighting setup is the industry standard for a reason. It's a simple formula that just works.
- Key Light: This is your main, brightest light source, usually positioned at a 45-degree angle to your product.
- Fill Light: This is a less intense light placed on the opposite side. Its job is to "fill in" and soften the shadows created by the key light.
- Back Light: Placed behind the product, this light creates a subtle glow around the edges. This little touch separates your product from the background and adds a real sense of depth.
Remember, the goal of lighting isn't just to make the product visible; it's to make it desirable. Good lighting highlights the best features, shows off the quality of the materials, and creates an aspirational mood that connects with your customer.
Tackling Common Shooting Challenges
Every shoot comes with its own set of puzzles. Knowing how to handle them will save you a world of frustration in the editing room. One of the most common headaches is dealing with reflections on shiny products like glass or glossy plastic. The trick is to control what's being reflected. Use large white foam boards to bounce soft light onto the product instead of aiming a harsh light directly at it.
Another frequent challenge is creating a clean, distraction-free background. You want the viewer's focus squarely on your product, not the clutter behind it. A simple roll of seamless paper in a neutral color like white or gray provides a perfect, professional backdrop. If you're on a tight budget, a clean wall or even a wrinkle-free bedsheet can work in a pinch. The key is to keep it simple so it doesn't compete for attention.
Finally, remember that the first few seconds of your video are absolutely critical. You need an immediate visual that grabs attention and stops the scroll. To learn more about crafting those all-important openings, check out our guide on creating hooks that make your videos go viral.
Editing Your Video Like a Pro
Alright, the shoot is officially a wrap. You've got a memory card loaded with promising footage, and now it's time for the real magic to happen. This is the post-production phase, where you get to transform all those raw clips into a polished, persuasive video that actually gets people to take action.
I know editing can feel like a huge mountain to climb, but breaking it down into a structured workflow turns it into a genuinely creative and rewarding process.
The right software is your command center for this whole operation. But don't worry, you don't need a Hollywood-level budget to get professional results. There are tons of powerful and surprisingly user-friendly options out there for every skill level.
Choosing Your Editing Software
The editing software you choose really comes down to your budget, your technical comfort level, and how much control you want over the final product. My advice? Don't feel pressured to jump into the most complex program right away. It's often better to master the fundamentals on a simpler tool first.
Here are a few of the most popular choices I see people using successfully:
- Free and Accessible: For quick edits, especially if you're working on the go, mobile apps like CapCut are fantastic. On a desktop, the free version of DaVinci Resolve is an absolute powerhouse. Seriously, it's a professional-grade tool used on major films, and the free version is more than enough for most product videos.
- Subscription-Based Powerhouses: Adobe Premiere Pro is pretty much the industry standard, and for good reason. It plays nicely with other Adobe apps like After Effects and has a massive community for tutorials. For Mac users, Final Cut Pro is a stellar one-time-purchase option known for its speed and clean interface.
The best tool is always the one you actually feel comfortable using. I'd recommend starting with a free option, watching a couple of beginner tutorials, and just getting a feel for the basic workflow.
Your Simple Editing Workflow
Once you've picked your software, resist the urge to just dump all your clips onto the timeline and hope for the best. A methodical approach will save you hours of headaches and lead to a much stronger final video. Think of it like assembling a puzzle—you find the edge pieces first.
A solid editing workflow generally follows four key stages:
- Organize and Select: The very first thing you should do is get organized. Create separate folders for your "A-roll" (your primary footage, like a person talking) and your "B-roll" (all the extra shots of the product in action). Watch everything you shot and pull out only the absolute best takes. These are your "selects."
- Assemble the Rough Cut: Now it's time to build the story. Lay your best A-roll clips down on the timeline in the correct order. At this point, don't sweat the small stuff like perfect timing or fancy transitions. Your only goal is to build the narrative backbone of your video.
- Layer and Refine: With the main story in place, you can start making it look good. Layer your B-roll shots over the A-roll to visually illustrate what's being said. This is where you'll add those beautiful close-ups and dynamic action shots. Trim the clips, tighten up the pacing, and add any simple text overlays or transitions.
- Polish the Audio: The final step is focusing on the sound. This is so often overlooked, but it's one of the most critical parts of the whole process. People will forgive a slightly shaky shot, but they will absolutely click away from a video with terrible audio.
The Critical Importance of Clean Audio and Music
Great audio quality instantly elevates your video and makes it feel more professional. Start by cleaning up your dialogue—remove distracting background noise and make sure the volume levels are consistent so your viewer isn't constantly reaching for the volume knob.
Then, it's time to add music. The right soundtrack can completely change the mood and drive the emotional impact of your video.
Don't just grab a popular song off Spotify. Using copyrighted music without a proper license is a surefire way to get your video taken down or demonetized. Instead, turn to royalty-free music services like Epidemic Sound or Artlist to find the perfect track legally.
When you're mixing everything together, the music should support the dialogue, not fight with it. A good rule of thumb is to lower the music's volume during spoken parts and bring it back up during sequences that are purely visual. This careful balance makes sure your core message is always crystal clear—a crucial part of an effective content marketing strategy.
Optimizing for the Modern Viewer
Let's face it: most videos today are watched on a phone. This reality should heavily influence how you finalize your edit. One of the most important stats to remember is that a staggering 85% of mobile videos are watched without sound. For a deeper dive, check out the latest mobile video trends on insivia.com.
What does this mean for you? If your video relies entirely on a voiceover to make sense, a huge chunk of your audience is going to be completely lost.
To solve this, burned-in captions are non-negotiable. These are subtitles that are permanently part of the video file itself, ensuring your message gets across whether the sound is on or off. Most editing software, and even mobile apps like CapCut, make this incredibly easy to do. It’s a small, simple step that dramatically boosts your video's reach and impact.
Common Product Video Questions Answered
Even with a killer plan, questions always pop up once you hit record. Getting straight answers to these common hurdles can save you a ton of frustration and help you dial in your approach. I’m going to walk through the questions I hear most often and give you some real, practical advice to keep your project on track.
Nailing these details is what separates an average video from one that actually connects with people and gets them to click "buy."
How Long Should My Product Video Be?
There's no magic number here. The "perfect" length for a product video depends entirely on where people are watching it and what you want them to do. Think of it like a conversation—you wouldn't launch into a ten-minute monologue with someone who just said "hi" in passing. Context is everything.
A good rule of thumb is to match the length to the platform's culture and the viewer's level of interest at that moment.
- Social Feeds (TikTok, Instagram Reels, Shorts): You need to be fast. Really fast. Aim for 15-60 seconds, max. Your only job is to stop the scroll, make one powerful point, and get out.
- Product Pages or YouTube Deep Dives: People watching here are already curious and looking for details. A longer format of 1-3 minutes works great. This gives you enough time to show off key features, demonstrate the product in action, and build some serious trust.
Here's the most important rule of all: deliver your core message within the first 3-5 seconds. No matter how long the video is, you have to earn their attention immediately. Your video should only be as long as it needs to be to make your point, and not a single second longer.
Can I Make a Great Video with Just My Phone?
Yes! One hundred percent, yes. The idea that you need thousands of dollars in camera gear to shoot a professional-looking product video is a total myth. The camera in your pocket right now is incredibly powerful and more than capable of capturing beautiful footage.
The secret isn’t the camera; it’s how you use it. A few simple tweaks to your technique can make your phone footage look like it was shot on a much more expensive setup.
To get professional results with just your phone:
- Use a tripod. This is the number one rule. It’s not optional. A tripod gets rid of shaky, amateur-looking footage and keeps your shots stable and clean.
- Find the light. Good lighting makes any camera look ten times better. Just set up near a large window to get that soft, flattering natural light.
- Get an external microphone. The mic on your phone is designed to pick up everything around you, which is not what you want. A simple lavalier mic that clips onto your shirt will make your audio crisp and clear.
- Lock your focus and exposure. Before you record, just tap and hold on your product in the camera app. This locks in the focus and brightness so it doesn’t jump around while you’re filming.
What Are the Most Common Mistakes to Avoid?
Knowing what not to do is just as critical as knowing what to do. Most product videos that fall flat are guilty of the same few mistakes, and they're all completely avoidable. If you can sidestep these three pitfalls, you’ll already be way ahead of the game.
The biggest mistake by far is bad audio. People will forgive video that isn't perfectly cinematic, but they will click away in a heartbeat if they can't hear you clearly or if the sound is muffled and distracting.
Next up is poor lighting. Dim, shadowy, or super harsh light makes your product look cheap and unappealing. It hides details and just screams unprofessional.
Finally, the most common missed opportunity is having no clear call-to-action (CTA). Never make the viewer guess what they should do next. You have to tell them, loud and clear: "Shop Now," "Learn More," or "Subscribe." A great way to amplify this is by working with creators who know how to drive action, a strategy we dive into in our guide on the key benefits of influencer marketing. A video without a CTA is just entertainment. A video with a strong CTA is a sales machine.
Ready to create stunning product videos without the hassle? JoinBrands connects you with over 250,000 talented creators who can produce authentic UGC, influencer videos, and professional ads that drive sales. Streamline your entire campaign from briefing to content approval and watch your brand grow. Start your first project today!