

 Your Instagram Reels Marketing Strategy for 2026
You've probably had this moment. The product photo is fine, the promo message is ready, and the Story still looks flat. It feels like a resized ad, not something people would stop and watch on Instagram.
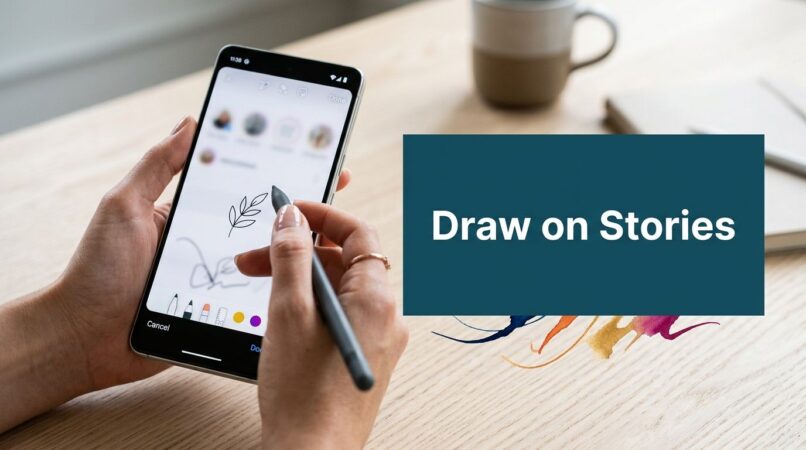
That's where the draw tool earns its keep. If you know how to draw on instagram stories with intent, you can turn a static asset into something that feels native, directed, and much more human without opening Canva, Photoshop, or another editing app.
Most brands underuse it. They add a quick arrow, maybe a circle, then move on. The better approach is to treat drawing as visual direction. You're telling the viewer where to look, what matters, and what action to take next.
Table of Contents
Why Drawing on Stories Matters for Your Brand
Instagram Stories launched in August 2016, and the drawing tool quickly became a core feature for adding annotations inside the native Story composer, which gave brands a lightweight way to make assets feel more personalized and UGC-like without leaving the app, according to this Instagram Stories drawing feature overview.
That matters because polished creative often underperforms in Stories when it looks too polished. People move quickly through Stories. Content that feels too designed can read like an ad before the viewer even processes the message.
Native-looking content usually wins attention
A hand-drawn underline, rough circle, or quick note can make a Story feel immediate. It looks like someone made it for the platform instead of repurposing a campaign asset at the last minute.
That doesn't mean messy is always better. It means intentional imperfection often works better than sterile perfection.
Here's where brands miss the opportunity:
- They post static product shots with no visual cue for where to look first
- They add too much text and expect people to read everything
- They use polished templates everywhere so every Story starts to feel interchangeable
- They forget motion psychology, even in still frames, where arrows, outlines, and highlights can create direction
Practical rule: If a viewer can't tell what matters in the first second, add a drawn element that makes the hierarchy obvious.
The draw tool helps you direct attention
For brand managers, the value isn't “fun doodles.” It's faster decision-making for the viewer.
A simple drawn element can help you:
- Point to a link sticker or poll
- Frame a product detail you want noticed
- Underline an offer without redesigning the whole layout
- Add personality to a founder-led or creator-style Story
- Make a reposted UGC asset feel branded without overproducing it
This is also one of the easiest ways to bridge the gap between brand polish and platform fit. You keep your visual identity, but you stop looking like you exported a display ad into Stories.
If your broader goal is reach and attention, strong Story execution is only one part of the system. This guide on how to increase Instagram views for your business is useful because it connects creative choices with the visibility side of your Instagram strategy.
What works and what doesn't
A few quick truths from practice:
| Approach | Usually works | Usually falls flat |
|---|---|---|
| Drawn arrows | Clear CTA direction | Too many arrows competing for attention |
| Handwritten notes | Human, timely, reactive | Hard-to-read scribbles |
| Neon outlines | Strong focal point | Overused glow on every frame |
| Highlighter behind text | Better readability | Thick color blocks covering the image |
The draw tool works best when it supports the message. It doesn't work when it becomes the message.
Your Guide to the Instagram Story Drawing Tools
The actual workflow is simple. Open Instagram, create or upload a Story, tap the pen or draw tool, choose a brush, set the color and stroke width, and draw with your finger or stylus. You can also press and hold on the canvas after choosing a color to flood-fill the background, and Instagram includes an eyedropper for sampling colors from your image, as outlined in this step-by-step guide to drawing on Instagram Stories.
That's the mechanics. The part most tutorials skip is what each tool is good for in an actual content workflow.

How to open the drawing interface
If you're new to the feature or haven't used it in a while, the path is usually straightforward:
- Create or upload a Story
- Tap the pen or squiggle icon
- Choose your brush style
- Pick a color
- Adjust thickness
- Draw directly on the image or video
On some app versions, you may also access drawing through the three-dot menu and then choose Draw.
What each brush is actually for
Not every brush deserves equal screen time. Some are workhorses. Some are for accents.
Marker or standard pen
Best for outlines, arrows, circles, and quick handwritten notes. If I'm marking a product feature or drawing a path toward a sticker, this is usually the first pick.Highlighter
This is your readability brush. Because it creates a translucent effect, it works well behind text when your image is busy. It's one of the easiest ways to improve legibility without dropping an opaque text box over the whole frame.Neon
Best used sparingly. It creates a glow effect that can make a person, product, or headline stand out. It's attention-grabbing, but if every Story has neon treatment, nothing feels special.Eraser It is often thought of as cleanup, but it is also a creative tool. You can erase into a color wash to reveal parts of the image underneath, which is useful for teaser content and “scratch-off” style reveals.
Color controls that brands should actually use
The color picker is more useful than many teams realize. If your Story uses a product image with a distinctive shade, the eyedropper lets you sample that exact tone from the image itself. That's one of the easiest ways to keep Stories aligned with your brand palette without manually guessing a close-enough pink, green, or beige.
A few practical uses:
- Sample from packaging to match the product's hero color
- Sample from clothing or background props so hand-drawn marks feel integrated
- Use the gradient selector when you want a more precise variation rather than Instagram's default swatches
A Story feels more premium when the annotations look like they belong to the image instead of sitting on top of it.
Brush width changes everything
Thickness is where a lot of brand Stories go wrong. Thin lines disappear. Thick lines can overpower the frame.
Use thinner strokes for:
- product detail callouts
- subtle outlines
- underlines beneath small text
Use thicker strokes for:
- bold arrows
- circles around sale prices
- scribbled backgrounds behind text
- broad visual framing
A good rule is to adjust thickness based on viewing distance. If the mark has to be understood instantly while someone taps through Stories, go bolder than feels necessary in the editor.
The flood-fill trick brands should use more
The press-and-hold background fill is one of the most useful in-app shortcuts. Choose a color, press and hold the screen, and Instagram fills the whole Story with that color.
That's handy when you want to:
| Goal | Better use of flood-fill |
|---|---|
| Make reposted UGC feel on-brand | Add a brand-colored background before layering assets |
| Build a teaser frame | Cover the image, then reveal selected parts |
| Create text-first Stories | Start with a clean color field instead of a photo |
| Reset a cluttered visual | Remove distractions and rebuild hierarchy |
If you're learning how to draw on instagram stories for marketing, this is one of the fastest upgrades you can make. It takes the tool from annotation to composition.
Advanced Drawing Techniques for Standout Content
Once you know the controls, the true advantage comes from combining them. The best Story drawings don't look like random marks. They look like simple art direction done quickly.
The tool ceases to be a simple way to “draw on top of a photo” and instead begins to “shape how the photo is read.”

Use the halo effect to create a focal point
One of the most useful Story tricks is the halo. Social Media Examiner documents this as a common Stories hack: tap the brush tool, choose the neon tool, select a color, and draw around the subject. The same tutorial also notes you can change brush thickness by dragging the slider, which is useful when you need a thinner outline or a much bolder marker effect in a Story creative, as shown in this guide to Instagram Stories creative hacks.
The halo works because it isolates the subject without forcing you to crop or redesign the image.
Use it for:
- a hero product in a launch Story
- a founder or creator in a selfie-style frame
- a customer photo you want to feature
- a single headline element in a busy composition
The trade-off is overuse. If every product gets a neon halo, the effect starts to feel gimmicky. Save it for the frame where focus matters most.
Layer colors for more depth
A single stroke can look flat. Layered strokes create more presence.
Try this sequence:
- Draw a thicker darker outline
- Add a slightly thinner bright stroke on top
- Use a final accent color for one edge or corner
This works especially well for:
- handwritten sale messages
- rough stickers or badge shapes
- CTA arrows that need more contrast
- pseudo-3D text outlines
You don't need to get fancy. Even two layers can make a hand-drawn mark look intentional instead of rushed.
If a stroke disappears against the background, don't switch the whole design. Add a second layer in a contrasting color.
Create custom text backplates with the highlighter
Instead of placing text directly on a photo and hoping it reads, scribble a broad highlighter stroke behind it. Because the highlighter is translucent, the image still shows through, but the text gains separation.
This is one of the most practical uses for the draw tool because it solves a real readability problem.
Best uses include:
- testimonial quotes over UGC
- product names over lifestyle photography
- launch dates over crowded backdrops
- ingredient or feature callouts
What usually doesn't work is making the highlight too narrow. If the stroke barely extends beyond the text edges, it looks accidental. Give it breathing room.
Use the eraser for reveal effects
The eraser gets more interesting after a flood-fill overlay. Fill the Story with a solid color, then erase selective areas to reveal the original image underneath.
That lets you create:
- teaser reveals for a launch
- spotlight windows around a product
- rough cut-out shapes
- hand-erased text zones
This style works because it introduces contrast and curiosity. The viewer sees enough to get interested, but not so much that the frame feels visually obvious.
Build a simple multi-color text effect
Instagram doesn't make advanced text styling especially flexible, but you can fake a stronger look with drawn strokes around text.
A practical formula:
- Add your text first
- Draw a thin bright outline around key letters or around the text block
- Add a separate underline in another color
- Finish with a small accent star, arrow, or circle
You get more visual energy without overwhelming the frame.
For most brands, the sweet spot is one main drawn effect per Story. Two if the layout is very simple. More than that and the frame usually starts fighting itself.
Pro-Level Workflows for Brands and Creators
You don't need more ideas. You need a repeatable way to make Stories look consistent under deadline pressure.
The difference between amateur-looking annotation and brand-ready Story graphics usually comes down to workflow. Fast doesn't have to mean random.

Use a stylus when precision matters
You can do a lot with your finger. But if you're drawing product outlines, tracing around packaging, or trying to keep linework clean, a stylus makes the work more controlled.
That matters most for:
- beauty brands outlining small packaging details
- jewelry and accessories close-ups
- handwritten pricing or offer callouts
- neat icon-style drawings
A stylus isn't mandatory for every Story. It's most useful when the mark itself needs to look deliberate, not casual.
Build reusable drawing assets
One of the best time-saving habits is creating your own mini asset library.
For example, you can make and save:
- Branded arrows in your key colors
- Hand-drawn circles for pricing or feature highlights
- Frame corners that give UGC a signature treatment
- Simple stars, checkmarks, or scribble badges for recurring use
Create them once, save versions to your camera roll, and reuse them as overlays. That keeps your Stories recognizable without redrawing everything from scratch each time.
Combine drawings with native Story elements
Drawings work best when they support stickers, text, and interaction features instead of competing with them.
A simple composition stack that works well:
| Layer | Role |
|---|---|
| Photo or video | Base visual |
| Drawn annotation | Direction and emphasis |
| Text | Message |
| Sticker or poll | Interaction or action |
| Small final accent | Personality |
When teams struggle, it's usually because they add every native element available. Poll, GIF, emoji slider, location tag, link sticker, and three drawn arrows all on one frame is too much.
Keep one primary action per Story card. Draw to support that action, not to decorate every empty space.
Batch your Story creation
If you're managing launches, promos, or weekly campaigns, batching is much easier than designing Story-by-Story in the moment.
A clean process looks like this:
- Choose 3 to 5 core Story layouts
- Decide where annotations will usually live
- Set a small approved color range
- Create examples for product, UGC, offer, and testimonial formats
- Save those patterns and repeat
This gives your brand a recognizable hand without making every Story identical.
Review before posting
The final check should be quick and ruthless.
Ask:
- Can I tell what matters instantly?
- Is the drawn element helping or distracting?
- Is the text still readable at Story viewing speed?
- Does this feel native to Instagram, not imported from another channel?
If the answer to any of those is no, simplify. Most Story creative improves when you remove one element, not when you add another.
Marketing Examples Using Instagram Story Drawings
The easiest way to understand how to draw on instagram stories strategically is to look at common campaign moments. The mechanics are simple. The decision-making is what separates useful Story design from filler content.

Product launch Story
A DTC skincare brand posts a clean packshot of a new serum. The image looks polished, but the eye doesn't know where to land.
A better version adds:
- a neon outline around the bottle
- a handwritten “new” note near the top
- a drawn arrow pointing toward the link sticker
- a soft highlighter stroke behind the launch message
The strategy is simple. The outline creates focus, the note adds immediacy, and the arrow turns attention into action.
Flash sale frame
A fashion brand has a sale Story with too much copy and no emphasis. People see “sale,” but they don't know the key detail fast enough.
A stronger execution circles the discount, underlines the deadline, and uses a thicker marker stroke behind the promo code. This creates hierarchy without rebuilding the whole asset in another design tool.
What doesn't work here is drawing all over the frame. One circle, one underline, one support mark is usually enough.
UGC repost with better readability
A customer tags your product in a casual mirror selfie. The photo is authentic, but the background is busy and the testimonial text gets lost.
Use the highlighter behind the quote, then add a small hand-drawn heart, star, or checkmark near the product area. That keeps the UGC feel intact while making the message easier to process.
This is one of the best uses of the draw tool for ecommerce brands because it keeps the asset native-looking.
Limited reveal campaign
A snack brand wants to tease a new flavor before launch. Instead of posting the package outright, it uses a solid color overlay and erases away a few sections to reveal part of the design.
The frame becomes interactive even though it's static. People pause longer because they're decoding the image.
A good Story drawing isn't art for art's sake. It reduces friction between the viewer and the message.
Poll and sticker support
A brand runs a “which shade would you choose?” poll. The image has multiple products, but the viewer needs help connecting names, colors, and the poll options.
Drawn numbers, circles, or arrows solve that quickly. You can guide the viewer from each product to the relevant label and then down to the poll sticker. The interaction becomes easier, which usually makes the frame feel less confusing and more worth engaging with.
Transforming Your Stories from Simple to Stunning
The draw tool looks basic until you use it like a strategist. Then it becomes one of the fastest ways to improve Story creative without adding more software, more approvals, or more production time.
That is where the true transformation happens. You are not just adding scribbles. You are creating hierarchy, directing attention, reinforcing brand style, and making Stories feel more native to the platform.
The strongest Story drawings usually do one of three things well:
- clarify what matters
- make a frame feel human
- guide the viewer toward an action
If you keep those goals in mind, the tool becomes much easier to use well. You don't need to draw like an illustrator. You need to know when a halo helps, when a highlighter improves readability, when an arrow earns its place, and when the best move is to leave the image alone.
That's what makes this skill useful for brands of any size. A startup founder, in-house social manager, agency team, or ecommerce brand can all create stronger Story assets directly inside Instagram. No elaborate production setup required. Just better visual judgment.
If you want a faster way to scale creator-style Story content beyond what your internal team can make alone, JoinBrands helps brands connect with creators and manage UGC workflows in one place. It's a practical option when you need more authentic assets to annotate, test, and turn into higher-performing Instagram Stories.